Spring Nature Activities
It’s spring! It’s time to enjoy the outdoors, and it can be done in the simplest ways.
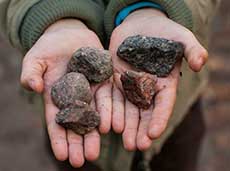
Take leisurely walks around the block, in the garden, in a park, or, if you live near Freeport, at Oakdale. Take along a “treasure bag” and encourage children to pick up cones, sticks, rocks. Have a shelf at home to display these treasures. Teach them not to pick flowers, except in your yard; instead, stop to observe carefully a plant or flower. Count the petals. Name the colors. Smell. Look at the leaves. Are the leaves directly across from each other on the stem or are they alternate—or perhaps only at the base of the plant? What shape are they? Are they smooth or rough? If the child is old enough, have him draw the flowers—or have her look very closely and sketch from memory. Do this with the child. Then look at the plant. What did either of you forget to include?
Choose a tree to befriend. Begin now in the spring and watch the tree closely as each season progresses. Let the child take pictures, which you can post on a bulletin board. But encourage everyone to draw his or her own impressions of the tree. At the end of year, make a collage of drawings, photographs, journal observations.
Spring Observations
Take your kids for a walk around your yard or a nearby park. What signs of spring do they see? Jot down their observations in a small notebook.
Choose a tree that is just leafing out; ask them to describe the leaf shape this point, its color and size. Have each one sketch a leaf. Then let the kids take pictures. (But have them sketch or draw first). Choose a flower. Choose a few other plants or growing things that the kids point out, but only a few.
For each one jot down the observations the kids make, have each one sketch one thing he or she chooses, and then let them take a few pictures – but only a few. Post their observations and choose a few pictures.
Two or three weeks later, repeat the process with the same tree, plant, flower, etc. Have them note the changes.
Repeat again in another two or three weeks.
You can use your imagination and theirs to put together, perhaps on poster board, their observations, pictures they’ve drawn, some of the pictures. Have them choose which of these they want to put on the board; by choosing, they will be more aware and reflective.
You will a have a visual and written book of the blossoming of spring.
Spring Exploration
Take a family trip out to Silver Creek Biodiversity Preserve on Saturday, May 11th at 10:00 a.m. to go on a tour and learn how to use binoculars!
As spring begins, more species of insects and birds can be seen outside. On a sunny day, consider going outside with your family and friends to see how many different types of insects you can find!
One fun thing to do this spring for the birds is to make a bird feeder! Take an empty juice carton, and cut a few holes about halfway down the side. Then, paint it your favorite color, poke two holes in the top to attach string to, and glue a stick for the birds to perch on near the bottom. Fill the carton with bird food, hang on a nearby tree, and watch for the birds to come!
Family Activity
Make your own window decals or “clings” to help protect your feathered friends during migration time. During migration, birds encounter numerous threats, including strikes with buildings and windows. Birds have difficulty knowing that a window is approaching when the reflection shows the sky behind them. If you break up the reflection in the window by turning off lights or putting decals in the windows, this can reduce window collisions and help the birds finish their journey.
This activity was created by New York Audubon and only requires a few items you likely already have at home. You’ll need some glue, dish soap, a plastic surface, a paintbrush, bird stencils or bird photographs to help you create fun shapes, and markers for decorating once dry.
Follow the instructions provided in the link above and create some clings to stick to your windows during peak migration of spring and fall! Make sure you create quite a few decals for large windows and place them no more than 2-4 inches apart on the window.

